How to Perfectly Clean the Hob Burners: A Step-by-Step Guide
Keeping your hob burners clean is essential not just for aesthetics, but also for the efficiency and safety of your kitchen. Over time, grease, food particles, and burnt residue can build up and block gas flow or cause uneven heating. Whether you have a gas or electric stove, regular cleaning will keep your burners functioning perfectly and extend their lifespan.
Step 1: Safety First – Turn Everything Off
Before you begin any cleaning, make sure the hob is completely turned off and the burners are cool. If your stove is gas-powered, it’s a good idea to shut off the gas supply for added safety.
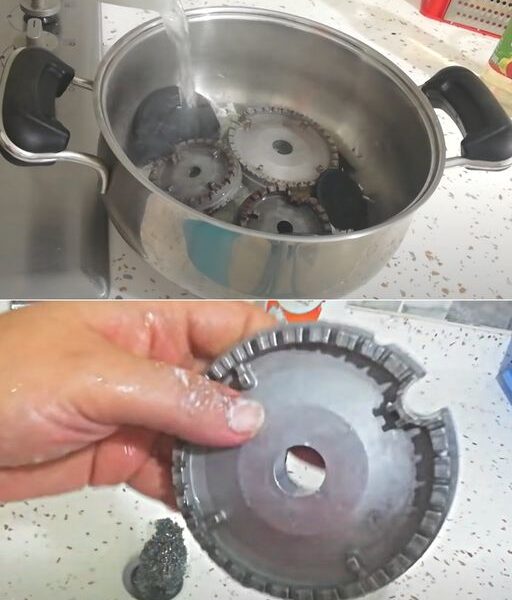
Step 2: Remove and Soak the Burners
Carefully remove the burner grates, caps, and heads. Most gas burner parts can be easily lifted off. Fill your sink or a basin with hot water and a few drops of dish soap. Soak the parts for 20–30 minutes to loosen grime and grease.
Step 3: Scrub Away the Grime
After soaking, use a non-abrasive scrubbing brush, old toothbrush, or a sponge to scrub each part. For stubborn stains or burnt-on residue, sprinkle baking soda over the area and add a few drops of vinegar. Let it fizz for a minute, then scrub gently. Avoid using steel wool or harsh chemicals that might damage the surface.
Step 4: Clean the Burner Openings
Use a toothpick, pin, or a small wire brush to carefully clean out the burner holes or ports. Be gentle — you don’t want to widen the holes or damage them. This step is crucial for gas burners to ensure even flame distribution.
Step 5: Rinse, Dry, and Reassemble
Thoroughly rinse all parts with clean water and dry them completely with a clean cloth or paper towels. Make sure no moisture is left, as it can interfere with ignition or cause rust. Once everything is dry, reassemble the burner parts and place them back on the stove.
Bonus Tip: Maintain Regularly
To avoid heavy buildup, wipe down your hob after each use. A quick clean daily prevents long-term damage and saves you effort in the future. For weekly deep cleans, repeat the above method — your burners will always look and perform their best.
✨ If you found this guide helpful, don’t forget to like and share it with your friends! Follow us for more practical cleaning tips and home hacks!