The carpenter’s trick to keep your wooden chair from moving again
A wooden chair becomes unstable when its joints (dowels, dowels or dovetail assemblies) lose their fit due to wear, changes in humidity or aged glues.
It also happens if a leg is “shortened” by deformation or if the crossbars become loose. The good news: with a correct arrangement in the joints, the chair will be firm again for years.
The carpenter’s trick: enhancing and re-gluing the joints
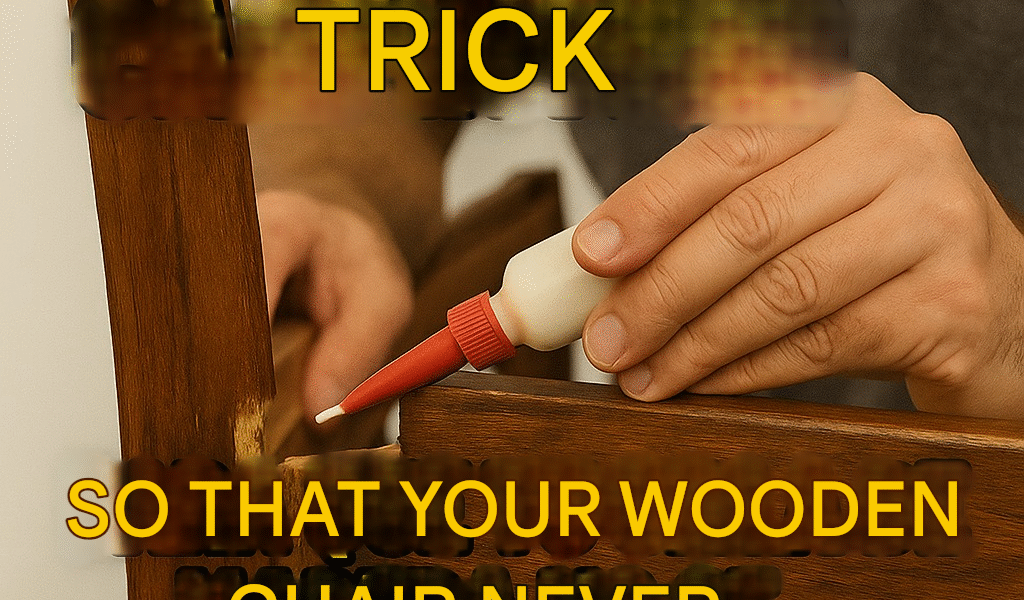
The professional technique consists of disassembling the loose joint, minimally increasing the diameter of the dowel or dowel with a veneer and gluing again with pressure. It remains invisible and very resistant.
Materials
- Carpenter’s tail (PVA/aliphatic).
- Strips of wood veneer or, failing that, thick kraft paper.
- Sergeants/presses and clamping squads.
- Masking tape, damp cloth and cutter.
- Fine sawdust (optional) for fillings.
- Isopropyl alcohol or warm water (only to clean surface glue debris; do not soak).
Step by step
- Diagnosis
Identify which pieces have a set: legs, crossbars, backrest. Mark with tape. - Controlled
Disassembly Gently swing the pieces to separate the loose joint. If it is difficult, do not force: apply moderate heat with a hairdryer and small taps with a rubber mallet. (Avoid soaking in water so as not to damage the finish). - Cleaning the joint
Remove dust and loose debris from old glue with a cutter or fine sandpaper. Clean the inside of the housing (mortise/hole) by blowing or with a dry brush. - Trimming the spike/dowel
Cut a very thin strip of veneer from the length of the spike. Dry test: it must enter firm without cracking. Adjust the width until it barely “bites.” - Gluing
Spread a thin layer of PVA glue on the tang and inside the housing. Wrap the spike with the veneer (or kraft) impregnated in glue and assemble immediately. - Square pressing
Places clamps so that the saddle is square and without twisting. Wipe off excess glue with a slightly damp cloth. Let it dry for at least 12 hours (ideal 24). - Spot fillings (optional)
If there is a visible leek, mix glue + sawdust until a “peanut butter” texture and fill. Sand when drying. - Final
review Loosen presses, check that there is no play and check that all four legs support pairs.
Common alternatives and when to use them
A) Glue injection (quick fix)
For loose joints that you can’t disassemble: inject PVA glue minimally diluted with water into the joint with a syringe, tighten with a clamp and let dry. Note: it is a practical solution, but less durable than underpinning with veneer.
B) Replacement of dowels
If the dowel is worn/cracked, make a new one of the same diameter (or 1 mm larger), glue and press. Ensures a factory-like fit.
C) Corner blocks (invisible reinforcement)
In chairs that “work” a lot, add triangular blocks in the corners of the seat (between the stringer and the leg) glued and screwed from the inside. They increase stiffness without seeing.
D) Leveling of legs
If it still “limps” on a flat surface, don’t cut by eye: mark the high leg with sandpaper on a straight board and “kiss” the tip just until it nods. Place equal felts on all four legs to protect and finely adjust.
Tips for taking care of your wooden chairs
- Don’t drag them: lift them to move them; drag loosens joints.
- Felts always: on all four legs; Review and change when they are spent.
- Controlled humidity: ideal 40–60%. Avoid resting the chair on wet floors.
- Dry or slightly damp cleaning: not soaked; dries immediately.
- Annual tightening: check visible screws and overall firmness. If you notice play, attend to it soon; it is easier to correct in time.
- Avoid direct sun and extreme heat: they dry out the wood and weaken the glue.
- Proper weight and use: Do not stand up on the seat or use the chair as a ladder.