How to propagate an orchid from a leaf
Propagating an orchid from a leaf is an exciting way to expand your collection of these beautiful plants. This propagation method can be effective if you follow the proper steps and provide the necessary care.
Below, I’ll walk you through the process of propagating an orchid from a leaf, so you can enjoy new plants and watch them develop.
Just remember that each orchid is unique and may have specific requirements, so it’s a good idea to research the particular species you’re propagating. With time and proper care, you’ll see your orchid leaf transform into a new plant, ready to grace your garden or indoor space with its elegance and beauty.
How to propagate an orchid from a leaf in a simple way
Ingredients
-A leaf from the mother orchid
-A sharp knife
-Distilled or chlorinated water
-A container for watering
-White glue
-A container for transplanting
-Orchid soil (orchid substrate)
-Transparent plastic
Steps to propagate an orchid from a leaf:
1-Preparation
- Make sure you have all the necessary materials on hand.
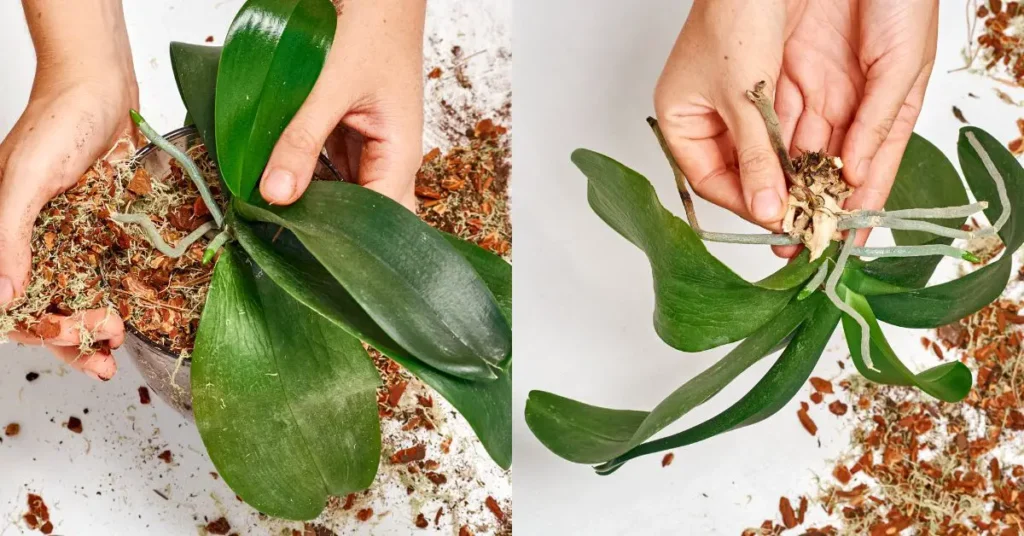
- Choose a healthy, mature leaf from the mother orchid. It should be firm and of a suitable size for propagation.
- Wash your hands and disinfect sharp knives with alcohol to prevent the spread of disease.
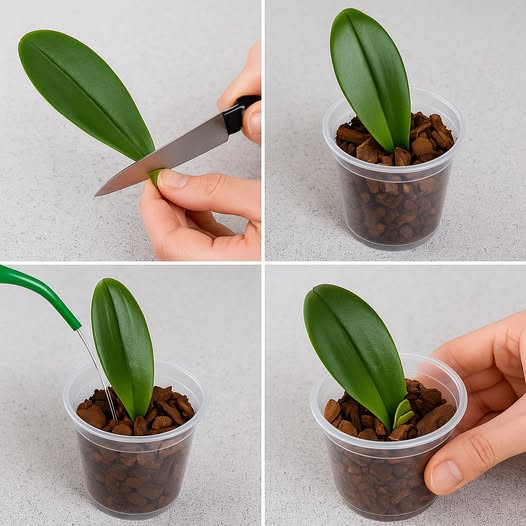
2-Cutting the sheet
- Using a sharp knife, make a clean, precise cut at the base of the leaf. Make sure you get a leaf fragment with at least one node or bulb, as this is where the roots and new growth will sprout.
3-Preparing the container for irrigation:
- Fill the container with distilled or chlorinated water. The water temperature should be close to room temperature.
4-Leaf immersion:
- Dip the base of the leaf fragment into the water in the watering container.
- Make sure that only the base of the leaf is submerged in the water and that it does not touch the bottom of the container.
5-Establishing the sheet:
- Place the container in a warm, bright location, but avoid direct sunlight.
- Let the leaf remain submerged in water for several weeks. During this time, roots will form and new growth will develop.
6-Preparing the container for transplanting:
- Fill the repotting container with orchid soil. Make sure the container has drainage holes to prevent waterlogging.
7-Leaf transplant:
- Remove the leaf from the water and let it dry for a few hours.
- Apply a thin layer of white glue to the cut end of the leaf. This will help prevent pathogens from entering and promote root formation.
8-Planting the leaf:
- Bury the cut end of the leaf in the orchid soil, making sure the node or bulb is in contact with the soil.
Post-transplant care:
- Place the container with the planted leaf in a warm, bright place, avoiding direct sunlight.
- Make sure to keep the soil slightly moist, but not soaked. Excessive moisture can cause root rot.
- Cover the container with clear plastic to create a humid environment and encourage rooting.
Additional maintenance and tips: - Regularly monitor moisture and root status. Adjust watering as needed to avoid overwatering or dryness.
- Avoid direct exposure to drafts, as this can dehydrate the developing plant.
As the plant grows and develops new roots and leaves, you can gradually remove the plastic and adjust it to normal humidity conditions. Be patient, as the propagation process can take several weeks or even months. Maintain consistent care and you’ll soon see results.
👉 Follow our page, like 👍, and share this post. Every click can make a difference—perhaps saving your own life or that of a loved one.