How to Make a Homemade Cable Extension Cord from a Plastic Bottle
In times when creativity and thrift go hand in hand, many turn to ingenuity to solve small household needs. One of these is the lack of electrical outlets or extension cords, especially in outdoor areas or places far from an electrical outlet.
That’s why, in this article, we’ll show you how to make a homemade cable extension cord using a 5-liter plastic bottle and a few simple materials. This solution is not only economical but also practical and durable if assembled correctly.
You can then follow the procedure in the following video from the Creation Tips channel:
Necessary materials
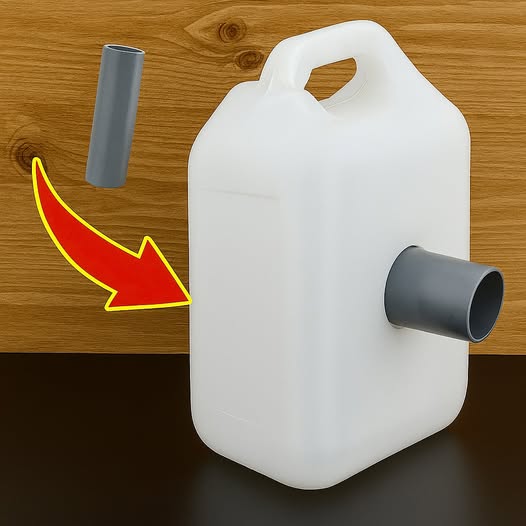
- 1 plastic can (preferably 5 liters)
- 1 short section of PVC pipe
- 1 small saw or hand saw
- 1 drill (can be a drill)
- Cables (depending on the desired length)
- 1 male plug
- 1 socket box (also known as plug box)
- Strong glue or silicone
Step by step to assemble the homemade extension cord
1. Prepare the plastic drum
. Wash and dry the drum thoroughly. Then, using a hacksaw, cut a side opening wide enough to comfortably handle the internal components. This opening will allow you to place and secure the outlet box inside the drum.
2. Drill the entry and exit holes
. Using the drill, drill a hole in the side of the drum, near the base, through which the cable that will be connected to the male connector will exit. Drill another hole in the top of the drum for the section of PVC pipe, which will serve as an entry or extra protection for the wiring.
3. Insert the PVC pipe.
Place the PVC pipe into one of the holes, securing it with strong glue or silicone. This pipe will not only guide the cables, but will also protect them from water or dirt if the extender is used outdoors.
4. Prepare the internal wiring
. Thread the wires through the PVC pipe and insert them into the drum. Connect the wire ends to the outlet box (following the correct color coding for phase, neutral, and ground, if applicable). Then, secure the box securely inside the drum using screws or glue.
5. Connect the plug.
At the other end of the cable (outside the drum), connect the male plug. Make sure the connections are secure and well insulated.
6. Seal and Test
Once everything is connected, seal the joints with silicone to prevent leaks if it’s going to be used outdoors. Then, test by plugging the plug into the outlet and using an electrical device on the drum’s socket.
Additional tips:
- Use good quality cables of the appropriate thickness to avoid overheating.
- If you are going to use this extension cord outdoors, it is recommended to place a plastic cap or additional cover over the drum for added protection.
- Never manipulate the inside of the drum while it is connected to electricity.
- For added safety, place warning labels on the drum indicating that it contains electricity.
- If you use it for garden tools, secure it in an elevated location to avoid contact with water.
This project is ideal for those looking for economical and functional solutions without relying on expensive or hard-to-find products. With proper care, this homemade extension cord can be a useful tool for household or DIY projects.
👉 Follow our page, like 👍, and share this post. Every click can make a difference—perhaps saving your own life or that of a loved one.