How to Grow Roses from Cuttings: A Simple Guide to Propagating Your Favorite Flowers
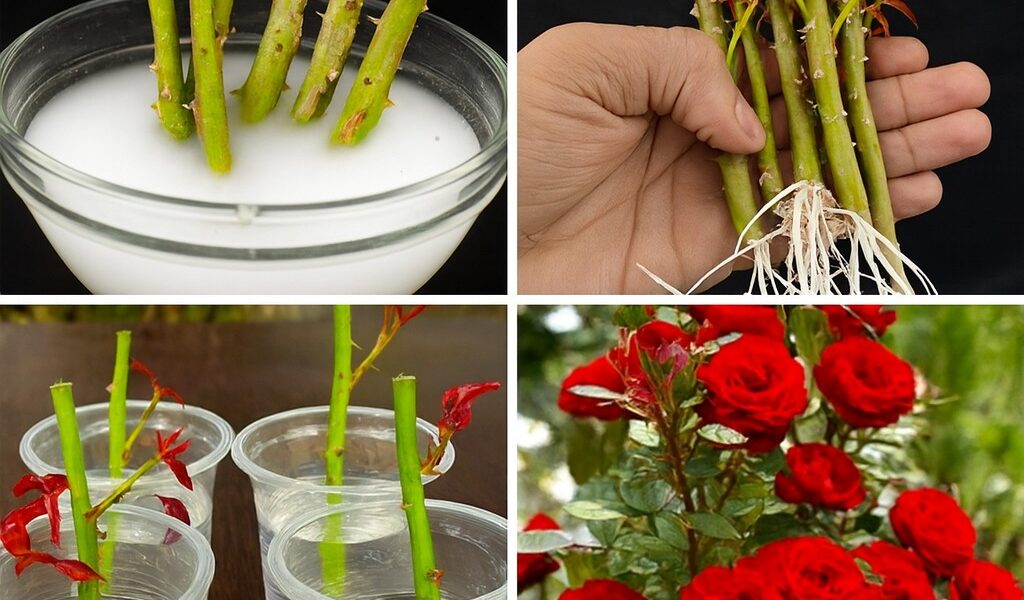
Propagating roses from cuttings is a simple and inexpensive technique that allows you to reproduce the exact characteristics of a rose bush you already have in your garden. Besides being an accessible method, it offers the satisfaction of watching a new plant grow from a branch.
With a few materials and a little patience, you can fill your garden with healthy and resilient roses.
Materials needed
- Healthy parent rose bush (preferably during spring or early summer)
- Sharp pruning shears or gardening shears
- Rooting hormone powder or gel (optional but recommended)
- Clean glass jar or container
- Potting soil (preferably a mix designed for roses or propagation)
- Small pots or containers with drainage holes
- Clear plastic bag or plastic bottle (for the humidity dome)
- Spray bottle with water
- Labels and marker (optional)
Step by step to propagate your rose bush
Selection of the parent rose bush:
Choose a healthy rose bush, free of any signs of pests or disease. Ideally, this procedure should be carried out during spring or early summer, when the plant is at its most vigorous.
Cutting the cutting:
Using sharp, disinfected pruning shears, cut a young stem about 15 to 20 cm long. Make sure it has at least three nodes (points where leaves grow). Remove the flowers and lower leaves, leaving only two or three leaves at the top.
Preparing the cutting:
Dip the base of the stem in rooting hormone powder or gel. This step is optional, but it helps stimulate root formation and increases the success rate.
Initial planting:
Fill a small pot with potting soil, preferably designed for roses or propagation. Make a hole with a pencil or toothpick and insert the cutting about 5 cm into the soil. Gently firm the soil around the cutting for stability.
Controlled humidity:
Mist the cutting with water using a spray bottle and cover the pot with a clear plastic bag or a cut-off bottle. This creates a mini-greenhouse effect that maintains high humidity, essential for rooting.
Suitable location:
Place the pot in a location with indirect light and good ventilation. Avoid direct sunlight, as it can overheat the cutting and dry it out quickly.
Follow-up:
Keep the soil consistently moist, but not waterlogged. After 4 to 8 weeks, you should feel resistance when you gently pull on the cutting, indicating that roots are developing.
Transplant:
When the cutting has strong roots, transfer it to a larger pot or directly to the garden, in fertile, well-drained soil.
Additional tips
- Pre-disinfection: Clean the scissors before cutting to avoid transmitting diseases to the cutting.
- Temperature control: Keep the cutting in an environment between 18°C and 25°C to promote rooting.
- Identification: Use labels and a marker to record the variety of each cutting if you are propagating more than one type of rose bush.
- Avoid anxiety: Don’t constantly uncover the mini greenhouse. Only open it to ventilate once or twice a week.
- Post-fertilization: When you transplant to the garden, start fertilizing with a product specifically for rose bushes after one month.