Make Your Own Bricks at Home with Rubble!
Throwing debris in the trash is wasting a valuable resource. With a little ingenuity and simple materials, you can transform construction scraps into eco-friendly, sturdy, and inexpensive bricks that are ideal for multiple home projects. This technique not only helps you save money, but also contributes to the care of the environment.
Next, you’ll learn how to make the mold, prepare the right mix, and produce bricks continuously, even hundreds per day.
Materials Needed
For the mold
- 2 wooden boards 90 cm long x 9 cm wide
- 2 boards of 9 cm x 9 cm
- Squad
- Pencil or marker
- Sierra
- Nails and hammer
- Sandpaper
- Iron plate or other rigid material for separators
- Wooden scraps for side locks
For the mixture
- 2 measures of debris (remains of brick, concrete or demolished wall)
- 2 sand measures
- 1 measure of cement
- Water (amount needed)
- Used oil (for demolding)
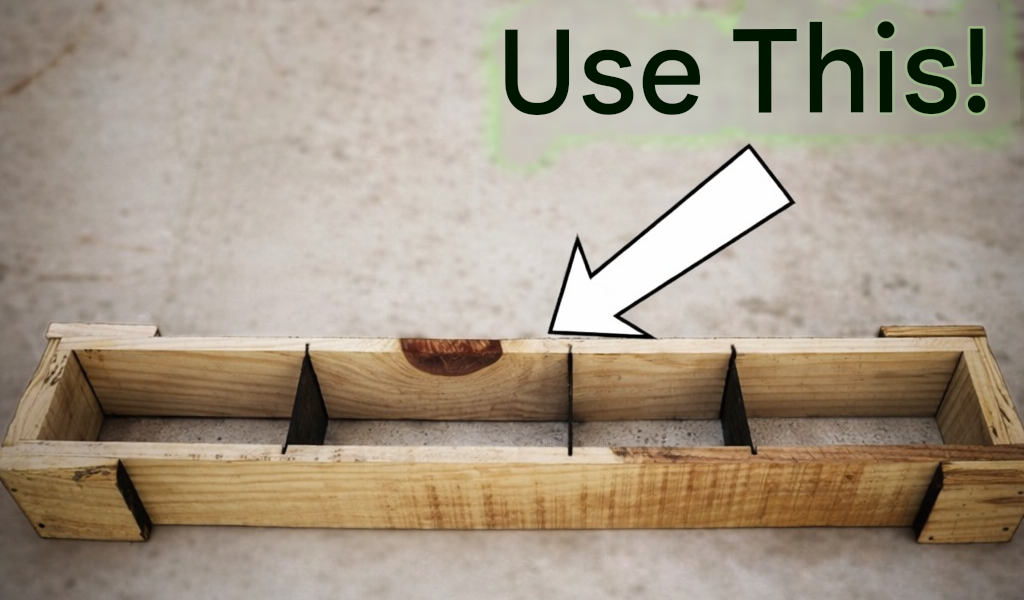
How to Build the Brick Mold
- Marking the Tables
Marks the beginning and end of both long tables. He then divides the remaining space into 22 cm increments, using a square to ensure accuracy. - Controlled
cuts Make straight cuts in the central marks, without exceeding half the thickness of the wood so as not to weaken it. - Initial
assembly Nail a small board at the beginning of one board and the other board at the end of the second board. This will shape the base mold. - Making Spacers
Cut the iron plate to the same width as the wood, sand the edges well, and use the first piece as a template to make the others. The mold can carry several spacers according to the desired size. - Placing Locks
Using pieces of wood, make two C-shaped side locks that prevent the mold from opening when pressing the mixture.
The mold is now ready to produce bricks continuously.
Preparation of the organic mix
- Place the debris, sand, and cement on a flat surface.
- Mix the material by moving it back and forth at least three times until you achieve a uniform composition.
- Add water little by little and mix until you get a moldable dough.
- The ideal consistency is achieved when you can form a figure with your hands and it maintains its shape without falling apart.
Brick production
- Always work in a shady place to avoid cracks.
- Apply used oil inside the mold and on the separators to facilitate demolding.
- Fill the mold with the mixture and press hard: the more compact the dough, the stronger the brick.
- You can incorporate materials such as dry grass, weeds, tile fragments, or nails to reuse even more waste.
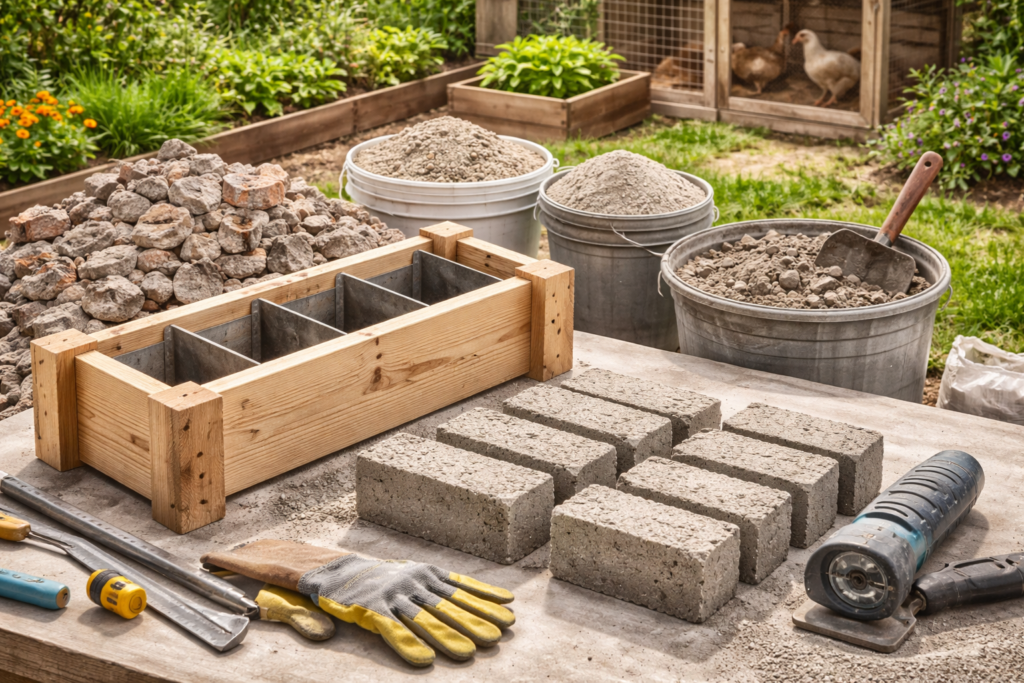
Once filled, disassemble the mold by first removing the locks and then the boards or dividers. The bricks are easily released and do not stick to each other.
Curing and Resistance
- After about 6 hours, spray the bricks with water.
- At 12 noon they can move without problems.
- The result is heavy, firm and durable bricks, suitable for fences, chicken coops, sidewalks, planters, orchards or decorative walls.
Tips and recommendations
- Don’t overdo the water in the mix: too much moisture weakens the brick.
- Wear gloves and eye protection while cutting and mixing.
- If you want a decorative finish, you can stain the mixture or apply cement varnish once dry.
- Always keep the mold clean and oiled to speed up production.
Making eco-friendly bricks from rubble is a practical, economical and sustainable solution. With simple materials you can create resistant pieces, reduce waste and give new life to what was previously considered garbage. A useful technique that transforms waste into opportunities.
👉 Follow our page, like 👍, and share this post. Every click can make a difference—perhaps saving your own life or that of a loved one.